...
Step 1 Visit www.en.vnnox.com and click Registerclick Sign Up at the top right of the page.
Step 2 Select a server node and click OK.
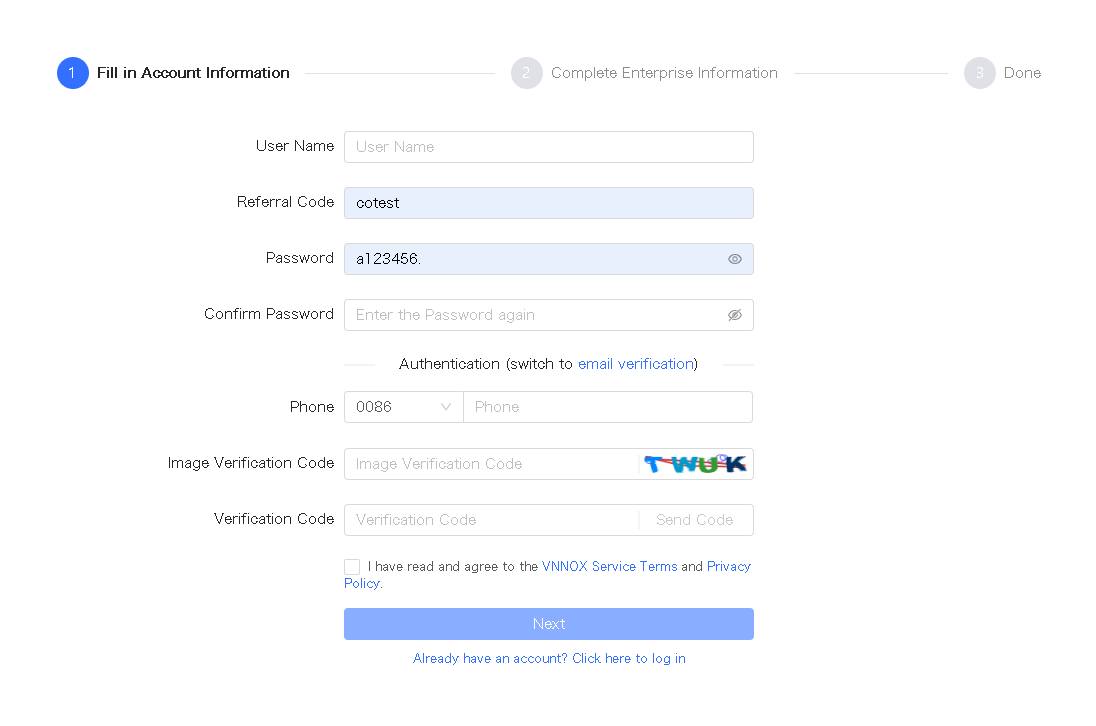
Step 3 Choose Register by Phone or Register by Email, and enter required information.Step 4 Click Register Fill in your account information and click Next.
Figure 1-1 Account information
Step 4 Click Submit.
After successful registration, the user you will have all the permissions of VNNOX and can manage all the resources. At the same time, VNNOX will automatically grant 3 free licenses of VNNOX AD for the user. The free licenses will be valid for 1 month.
Login
Step 1 Visit www.en.vnnox.com and click LoginLog In at the top right of the page.
Step 2 Select a server node and click OK.
Step 3 Enter the your account name and password, and click .
Step 4 Click Log In to enter to access the homepage of the cloud platform.
If If email verification or SMS verification is enabled, email verification or SMS verification will be required when you log in to VNNOX. If you have not bound to an email or phone, you will be required to bind to an email or phone when you log in to VNNOX.
Figure Figure 1-1 2 Homepage of the cloud platform
Step 4 Click any position of the image of a service to enter 5 At the top left, click ![]() and select an application to access its homepage.
and select an application to access its homepage.
When When you enter access VNNOX Standard, VNNOX AD, or iCare for the first time, a prompt reminding you to set the default system setting prompt is displayed. After you set the default system is set, it will be displayed directly you will access the system you set by default when you click click Log In next time.