Step 1 Choose  > Media Management > Solution.
Step 2 Click Click New. Step 3 Enter Enter a name and specify a category(ies) for the solution and set its categories, and click , and then click Next.
Step 4 3 Select Select a frame template and click OK. The Solution Settings tab of the frame template attribute page and the week timetable will appear. An example of a solution with only one frameset is shown in Figure 5-2. Description of the page is shown in Table 5-4. If the solution has more framesets, it is required to schedule each of the framesets respectively.
...
click OK to access the Solution Settings tab page.
Figure 1-11 The Solution Settings tab
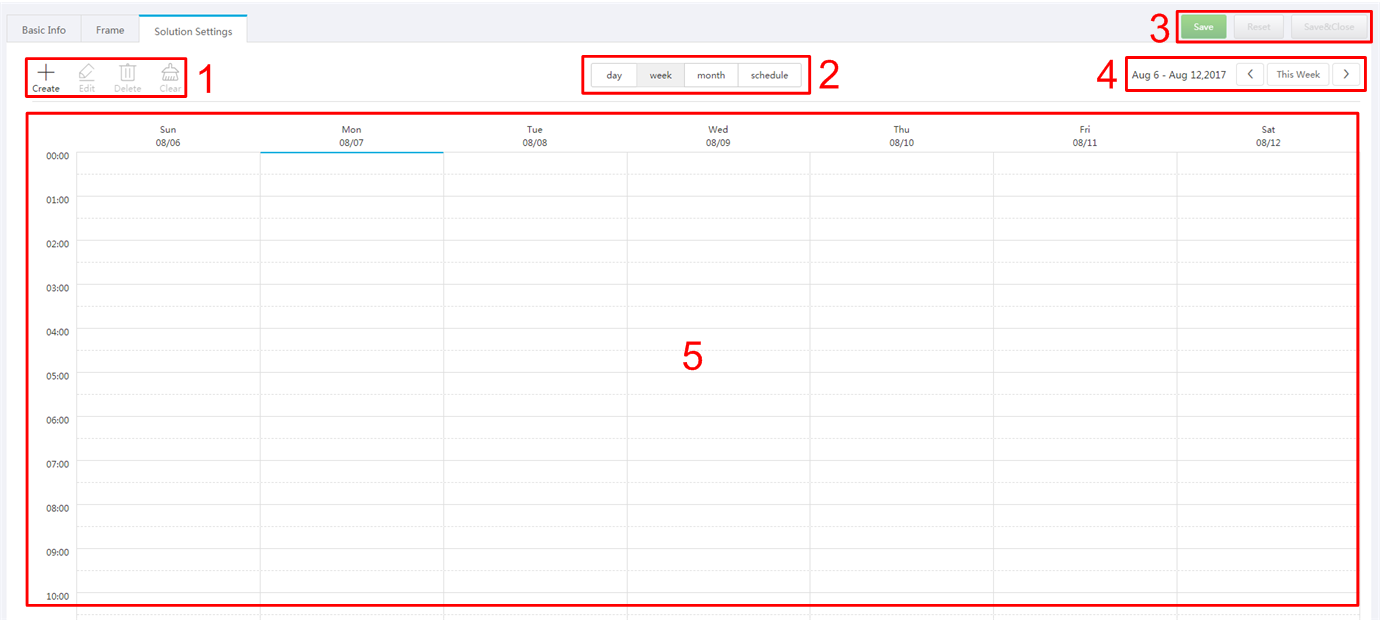

Table 5-4 Description of the Solution Settings tab
...
No.
...
Function
...
Description
...
1
...
Schedule buttons
...
- Create: Click this button, and the Create dialog box appears.
- Edit: Select a schedule in the timetable and click this button. Then the Edit dialog box appears.
- Delete: Select a schedule in the time table and click this button to delete the schedule.
- Clear: Click this button to clear schedules.
...
2
...
Date buttons
...
- Day: Show the timetable in day view.
- Week: Show the timetable in week view.
- Month: Show the timetable in month view.
- Schedule: List all schedules and the media contained in each schedule.
...
3
...
Common buttons
...
- Save: Save configuration.
- Reset: Restore configuration.
- Save&Close: Save configuration and close the attribute page.
...
4
...
Date switching buttons
...
 : Switch to a previous date by day, week or month.
 : Switch to a subsequent date by day, week or month.
- Today: Switch the timetable to current day.
- This Week: Switch the timetable to current week.
- This Month: Switch the timetable to current month.
...
5
...
Schedules
...
The default way to display timetable is by week.
Step 5 Click day, week or month to enter relevant timetables. Perform any of the following operations to create the solutionStep 4 Do any of the following to create a schedule.
- Click Create.
- Click a cell in the timetable and click
 . Each cell of the timetable in day and week views stands for one hour, while in month view each cell stands for one day.
...
Step 5 Select a playlist
...
from the Playlist tab page of the Create dialog box.
Step
...
6 Select
...
the Play plan
...
- When the Repeat is set to Not repeating, the solution can be played normally according to the plan if the date is set to the current day or after 7 days. The solution will not be played if the date is set to other days.
- If the Repeat is set to Every day, Weekly, Per month or Per year, the solution will be played repeatedly according to the period you set.
Step 8 Select the Option tab and set the schedule color displayed in the timetable.
...
tab to set a playback timeslot and recurrence interval.
Step 7 Select the Option tab to set the display color of the schedule.
Step 8 After the configuration
...
,
...
click OK. The schedule
...
will be graphically displayed
...
in the timetable
...
.
...
- Drag the top and bottom edges of a schedule to modify its timeslot.
- Drag a schedule to any position of the date when the schedule will be played to modify the timeslot.
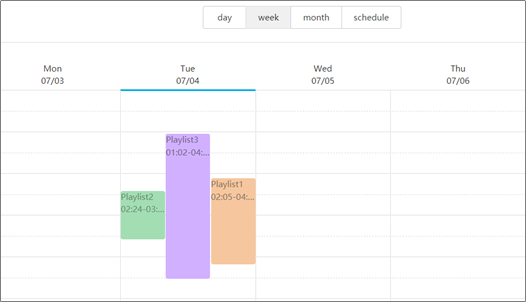
- Drag the schedules to modify the playback priority order during the overlapped timeslot, for example, the priority order of the three playlists in Figure 5-4 is: Playlist3 > Playlist2 > Playlist3. After the playback of Playlist2 is over, Playlist3 will be played from the beginning. Playlist1 will not be played.
- Double click a schedule and the Edit dialog box appears.
Figure 5-4 With overlapped timeslot
Drag the three schedules in Figure 5-4 until they don’t have overlapped timeslots. Then the schedules is displayed as the Figure 5-5.
Figure 5-5 Without overlapped timeslot
...
Figure 1-12 Solution schedules
