Application Scenarios
Log into and use the VNNOX system.
Related Information
Users are the people who access the VNNOX system.
- A registered user of VNNOX has access to all the permissions and can create multiple sub-users.
- The default role of a registered user of VNNOX is the system administrator and cannot be changed.
| Expand | ||
|---|---|---|
| ||
Users are allowed to view the users created by themselves only. Step 1 Choose Step 2 View user list or view a user by searching for the user name.
Step 3 (Optional) Click a user name to go to the user property page. |
| Expand | ||
|---|---|---|
| ||
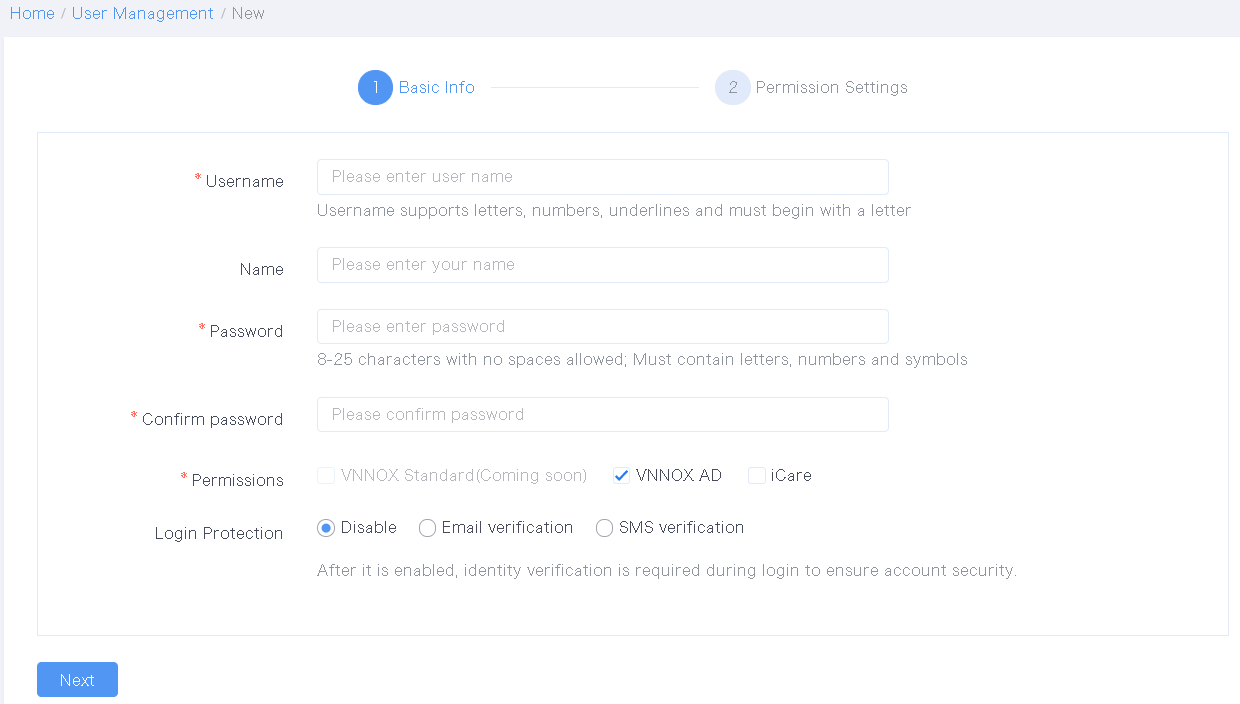
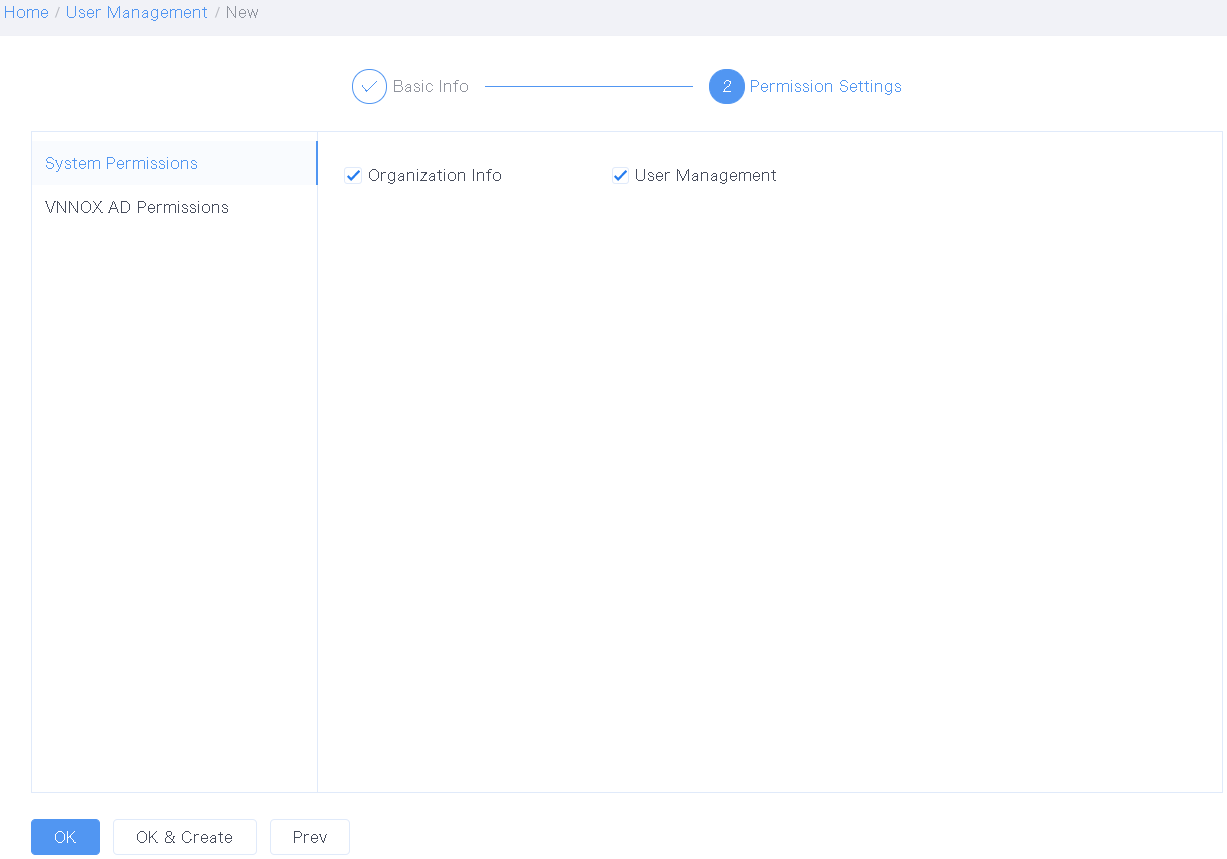
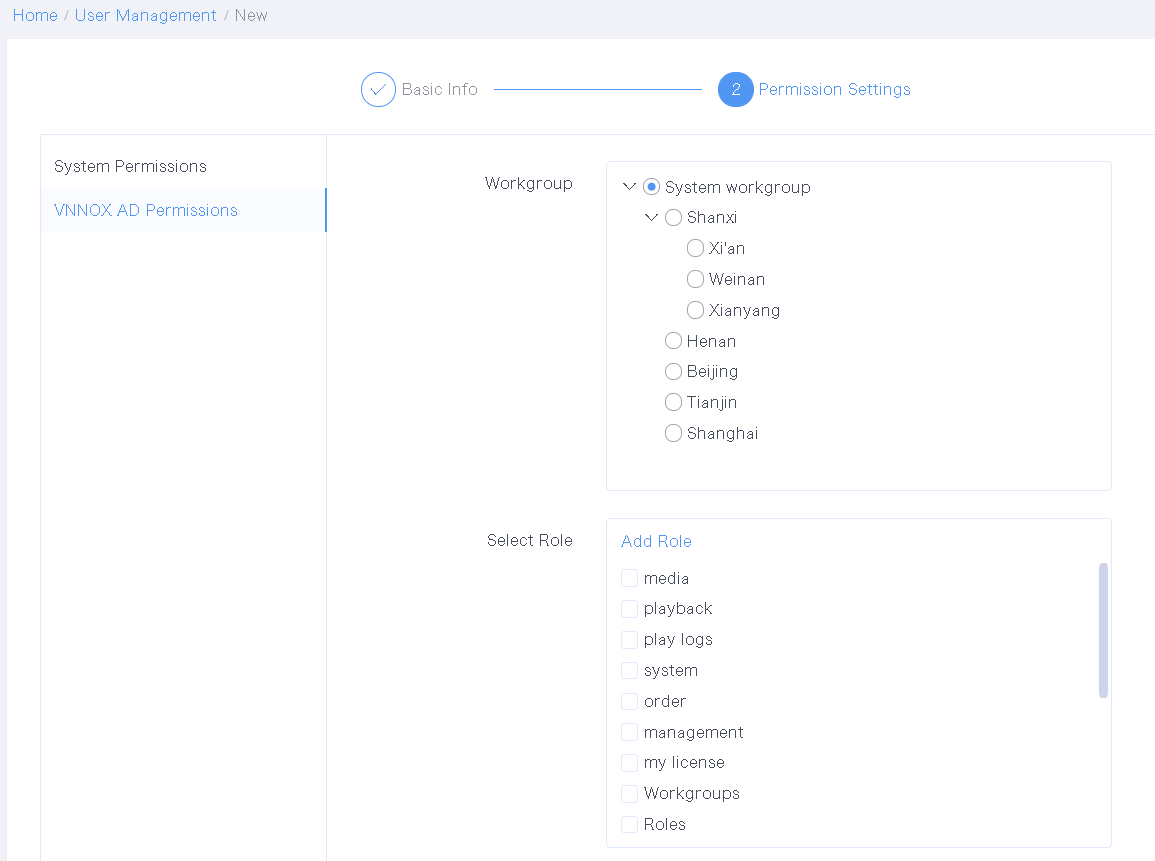
Step 1 Choose Step 2 Click New. If a sub-workgroup under the system workgroup does not have any sub-workgroups, the user in that sub-workgroup must create a sub-workgroup first and then create users. The system workgroup can have up to 5-level sub-workgroups. Since the level 5 sub-workgroup cannot have sub-workgroups, users in that sub-workgroup cannot create users. Step 3 Enter your user name and password and choose your required services. Figure 4-10 Basic info Step 4 Click Next. Step 5 On the System Permissions page, select permissions you want to grant to the user to be created. Figure 4-11 System permissions Step 6 On the permission settings page of the each service, set the workgroup and roles for the user to be created. Click Add Role to create a role. Figure 4-12 Specifying a workgroup and roles
Step 7 After the settings are done, click OK, or click OK & Create to continue creating users. |
...
| title | Modifying User Attributes |
|---|
Step 1 Choose  > User Management.
Step 2 Select a user and click Edit, or click a user name to enter the user property editing page.
Figure 4-13 User properties
...
Operating Procedure
Step 1 From the navigation bar on the left, choose Organization > Users.
View the user list. You can view the users (except yourself) in your workgroup and the sub-workgroups.
Figure 1 User list

Step 2 Create a user.
1. Click New.
2. Enter a user name and specify a workgroup and role for the user.
Figure 2 Basic info

3. After the settings, click OK.
The user name and password are copied automatically. If you want to copy them again, click Copy.
Figure 3 User name and password

Step 3 Modify user properties.
1. In the user list, click Edit in the Action
Figure 4 User properties

Table 1 User properties
| Tab Name | Description |
|---|---|
| Basic Info | View |
...
| and |
...
| change the user name |
...
| . | |
| Status |
|
...
| |
| Login Protection | After you enable email verification or |
...
phone verification |
...
, email verification or |
...
phone verification will be required when you log in to VNNOX. After |
...
login protection is enabled, if no email/phone is bound, the page of email/phone binding will be displayed directly |
...
when you log in to VNNOX for the first time. |
...
Permissions
Set system permissions of the user, and specify the workgroup and roles for the user in the services.
...
2. After the editing is done, click OK.
Step 4 Change workgroups or roles.
1. From the user list, select one or more users.
Figure 5 User management

2. Click Change workgroup or Change Role.
- A user belongs to only one workgroup.
- One or more roles can be assigned to a user.
...
Approve Set
...
Choose to or not to approve all the media added by the user.
This tab is shown only when media item approval is enabled.
Step 3 After the attributes are edited, click Save.
...
| title | Viewing Login Logs |
|---|
Step 1 Choose > User Management.
Step 2 Select the User Login Logs tab.
Figure 4-14 User login logs

Step 3 Set search criteria.
The default search range is 8 days (including the current day). The maximum range can be last 90 days.
Step 4 Click Search.
...
3. After the editing is done, click OK.