Application Scenarios
Specify applications you want to enable, including VNNOX Standard, VNNOX AD and iCare.
Operating Procedure
Step 1 From the navigation bar on the left, choose System Settings > Application Configuration.
Figure 1 Application Configuration
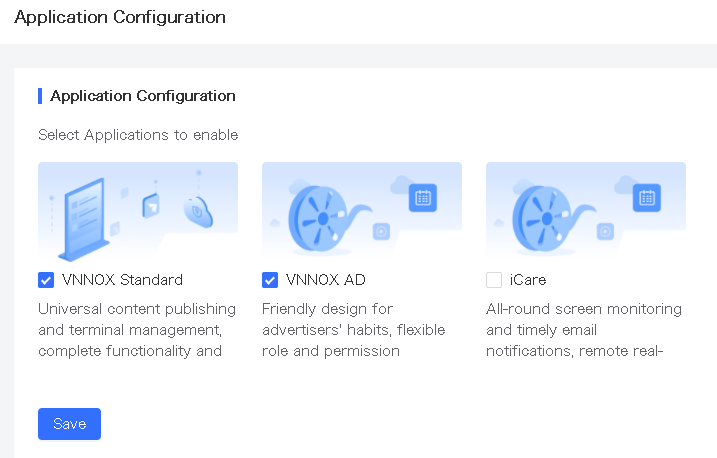
Step 2 Select or deselect application names.
- The Default System module in Basic Info > Personal Settings only includes system management and the enabled applications.
- When creating a role, you need to configure the system permissions and permissions of the enabled applications.
- Deselecting an application will clear all its permissions assigned to roles.
Step 3 After the settings, click Save.
Application Scenarios
Customize VNNOX by setting the URL, name, copyright, logo, etc.
Related Operations
Before customizing a domain name, please ensure that you own the domain name and have the domain name successfully filed in the Ministry of Industry and Information Technology of the People’s Republic of China.
Alibaba Cloud filing service: https://beian.aliyun.com
Below is the procedure to customize a domain name in GoDaddy.
Step 1 Visit the website of your domain name provider, sign in to your account and enter the domain name management control (or control panel, user center, etc.).
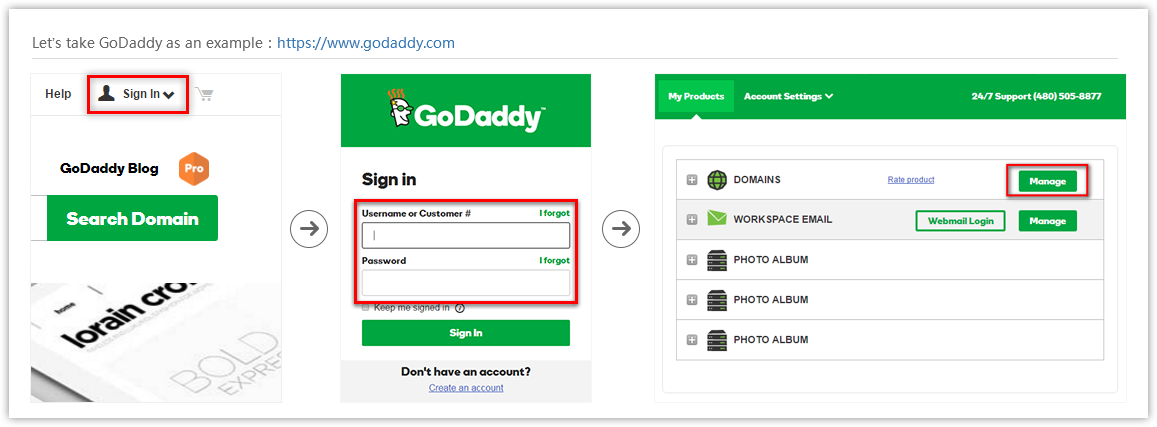
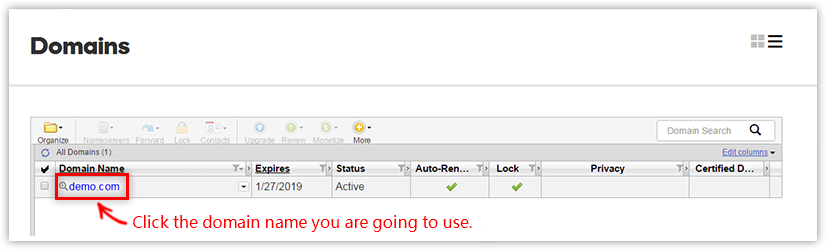
Step 2 Click the domain name to access the configuration page.
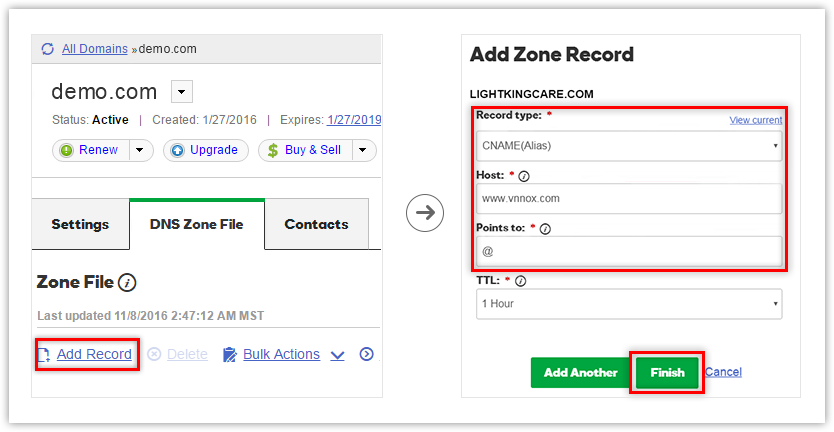
Step 3 Add a parsing record and save the configuration.
- Record type: CNAME
- Host: @
- The record value is based on your node.
China: cname-cn.vnnox.com
Japan: cname-jp.vnnox.com
Europe: cname-eu.vnnox.com
India: cname-in.vnnox.com
Australia: cname-au.vnnox.com
If you want to use the second-level domain name of the current domain name, fill the second-level domain name in the Host field.
Operating Procedure
Step 1 From the navigation bar on the left, choose System Settings > Custom Domain Name.
Step 2 In the Style area, select a theme for the navigation bar and set an enterprise logo.
Step 3 Select Custom System and set a domain name, system name, and copyright information.
Step 4 Click Advanced, choose to show or hide the registration entry, and set a browser tab icon and contact information.
If Registration Entry is selected, the registration entry will be shown after the user logs in to the customized system, otherwise, it will be hidden.
Figure 2 Login and registration

Figure 3 Service system

Step 5 After the settings, click OK.
After the settings are done, you need to log in to the system with the customized domain name, and then the customized information will take effect.