Application Scenarios
Sort media, playlists and play logs in order to quickly filter out and find them.
Related Information
...
Remote control plans allow for scheduled control of screens. When users associate with remote control plans in player attributes, the control plan templates preset here can be used directly.
| Expand | ||
|---|---|---|
| Expand | ||
| ||
| ||
System administrator and the sub-users of system administrator can view all categories. Step 1 Choose Step 2 View category list, or view a category by searching its name. | ||
| ||
Step 1 Choose Step 2 Click New. Enter a name and select a type for the control plan, then click OK. The Command plan tab page is displayed. Plan types include player restart, screen status control, video source switching, power control, volume control, and brightness control. Figure 7-4 Creating a remote control plan
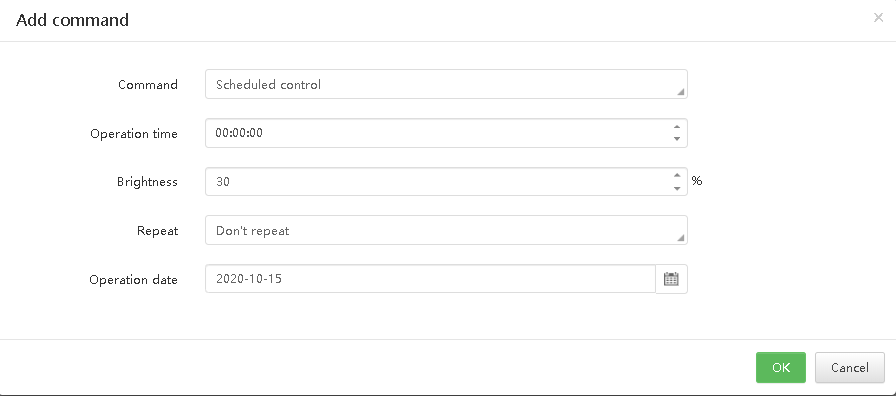
Step 3 Click Add, select a command, and set the execution plan, then click OK. The command here is based on the plan type you selected when you create the plan. Figure 7-5 Adding a command
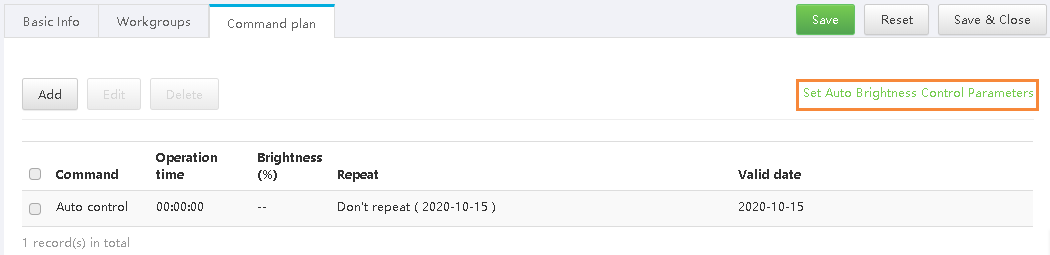
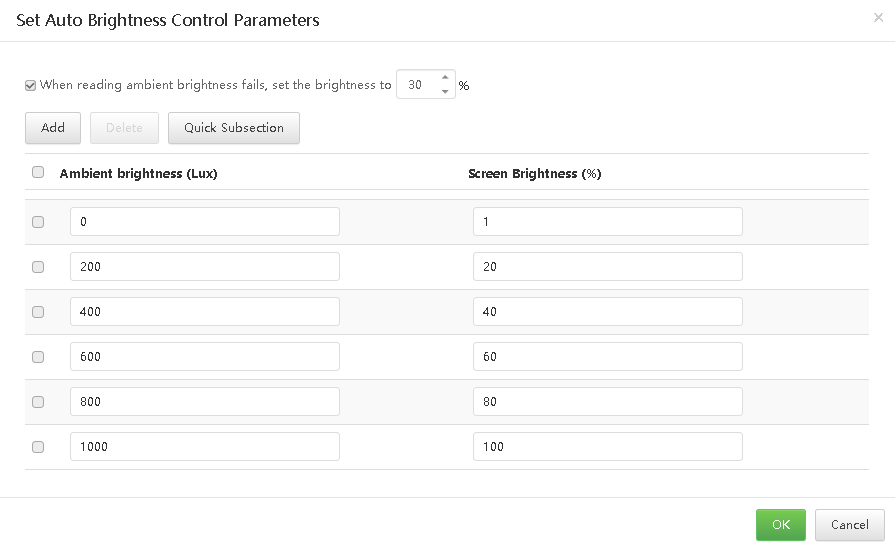
Step 4 To add an automatic control command for brightness control, set the automatic brightness control parameters, namely, the relationship between the ambient brightness and screen brightness. 1.At the upper right of the Command plan tab page, click Set Auto Brightness Control Parameters, as shown in Figure 7-6. Figure 7-6 Setting automatic brightness control parameters 2.In the dialog box that appears, divide the ambient brightness range into several sections and specify a screen brightness for each section. Figure 7-7 Setting brightness mapping table 3.Click OK. |


| Expand | ||||||||||||
|---|---|---|---|---|---|---|---|---|---|---|---|---|
| ||||||||||||
Step 1 Choose Step 2 Select a category and click Attribute to enter the attribute page of the category . Step 3 Modify category attributes and then click Save or Save&Close. | ||||||||||||
| Expand | ||||||||||||
| ||||||||||||
| ||||||||||||
Related InformationIf a remote control plan is applied to a player, modifying the plan here and in the player attributes do not affect each other. Operating ProcedureStep 1 Choose Step 2 Select a remote control plan and click Attribute, or click the remote control plan name. The attributes of the remote control plan are illustrated in Table 7-3. Table 7-3 Remote control plan attributes
Step 3 After the attribute editing is done, click Save or Save & Close. | ||||||||||||